How to use headings on your site

Headings structure your content for both readers and search engines. They help users scan a page, understand its content, and quickly locate the information they need. Search engines and AI systems use headings to interpret the topic and structure of your content. By using one clear H1, supported by well-written H2 and H3 headings, you can improve readability, accessibility, and SEO simultaneously.
Key takeaways
- Headings structure content and boost readability for users and search engines, enhancing SEO simultaneously.
- Use one clear H1 for the main topic, with H2s for main sections and H3s for sub-sections, maintaining logical hierarchy.
- Headings improve accessibility for users with assistive technology by providing clear navigation and organization.
- Avoid common mistakes like skipping heading levels, using vague labels, or keyword stuffing to maintain clarity and trust.
- With Yoast SEO, optimize heading structure and keyword usage to enhance content quality and search rankings.
Did you get a red or an orange traffic light for subheading distribution in Yoast SEO? Learn how to distribute them better. Or did Yoast SEO give you feedback on how you use your keyphrase in subheadings? Learn how to improve that.
What are headings?
Headings are the titles and sub-titles used to structure your content. In HTML, headings range from H1 to H6. These tags inform browsers, search engines, and assistive technologies about the organization of your content.
On a typical page, the H1 is used for the main topic. H2 headings divide the text into main sections. H3 headings divide those sections further. This hierarchy creates a logical outline of your page, similar to the table of contents of a book.
Without headings, your content becomes difficult to scan. With clear headings, readers can immediately see what your page is about and which sections are relevant to them.
Why are headings important for SEO?
Headings help search engines understand what your content is about and how different topics on the page relate to each other. They provide structure, context, and signals about the importance of different sections.
Your H1 usually tells search engines what the main topic of your page is. Your H2 and H3 headings support that topic by introducing related subtopics. When this structure is clear and logical, it becomes easier for search engines to interpret your content correctly.
Headings also support semantic SEO. Rather than focusing on one keyword, search engines now assess topical relevance and context. Well-written headings naturally contain related terms and concepts that reinforce the overall topic of the page. This approach works best when combined with thorough keyword research and in-depth content. You can read more about this in our guides to keyword research and high-quality content.
Headings also play a role in how content is interpreted by AI driven search systems. Clean structure makes it easier for these systems to extract accurate answers from your pages.
Why are headings important for readers?
Most visitors do not read every word of a page. They scan first. They look at the title, skim the subheadings, and only then decide which parts to read in detail. Headings support this natural reading behavior.
Clear headings improve readability by breaking long texts into manageable sections. They help readers understand what each part of the article is about before they start reading it. This lowers the effort required to engage with your content and keeps people on the page longer.
Readability is a key quality signal. If you want to go deeper into this topic, our readability guide explains how structure, sentence length, and headings work together to create content that is easy to read.
How to use headings correctly
Using headings correctly means following a logical hierarchy and writing them with the reader in mind. Each page should have one clear H1 that describes the main topic. This is usually your page title. Below that, use H2 headings for your main sections. If a section becomes lengthy or complex, use H3 headings to further divide it.
Do not skip heading levels. An H3 should always follow an H2, not jump directly from an H1. This keeps the structure logical for both users and machines.
Your headings should describe what the section is about. Avoid vague labels such as “Introduction” or “More information.” Instead, write headings that clearly explain what the reader will learn in that section.
How many H1 headings should you use?
In most cases, you should use one H1 per page. The H1 defines the main topic of the page and helps both users and search engines understand what the page is about at a glance.
Although modern HTML allows more than one H1, using multiple H1s often creates confusion about the primary focus of the page. For consistency and clarity, one H1 is still the best practice for most websites.
Your H1 should be written naturally and should not be stuffed with keywords. It should read like a real headline written for humans. If you need help with this, Yoast SEO can balance clarity and optimization in headlines and titles.
How to use H2 and H3 headings
H2 headings divide your article into its main sections. Each H2 should cover one important aspect of your topic. When someone scans only your H2 headings, they should still be able to understand the overall structure and purpose of your article.
H3 headings are used within an H2 section to break it down into smaller parts. They are useful when you explain steps, compare options, or cover several closely related points within one larger section.
You should not use H3 headings unless they add clarity. Headings are meant to support the reader, not to decorate the page.
Common mistakes when using headings
A common mistake is using headings only for visual styling. Headings are not just larger or bolder text. They define the structure of your content in the HTML. Choosing a heading level solely based on its appearance can compromise the semantic structure of your page.
Another frequent issue is skipping heading levels, such as jumping directly from H2 to H4. This disrupts the logical structure of the page and creates issues for screen readers and search engines.
Repeating the same heading text in multiple places is also a problem. Each heading should be unique so that users and search engines can clearly distinguish between sections.
Keyword stuffing is another mistake. Headings should sound natural. If they read like a list of search terms, they reduce trust and harm readability. Clear, descriptive language always works better.
Headings and accessibility
Headings are essential for accessibility. Screen readers utilize headings to assist users in navigating a page efficiently. With a proper heading structure, visually impaired users can easily navigate from section to section and understand how the content is organized without needing to listen to the entire page.
A clear and logical heading hierarchy improves usability for everyone, not just for users of assistive technology. It is also strongly aligned with how search engines assess page quality.
If accessibility is part of your broader optimization work, it should be considered alongside internal linking and overall site structure. Don’t forget that, in many cases, what’s good for accessibility is also good for SEO!
Read more: Writing accessible content: 4 checks you can do with Yoast SEO and the block editor »
Headings in WordPress and Yoast SEO
Yoast SEO uses headings as part of both its SEO analysis and its readability analysis. One of the checks it performs is on your subheading distribution, which looks at how evenly your text is divided into sections with headings. If large blocks of text appear without any subheadings, Yoast will flag this and suggest you add subheadings to improve the readability of that part.
Effective subheading distribution means readers regularly encounter clear signposts that help them navigate the page without feeling overwhelmed by long, uninterrupted paragraphs. See the video below to find out more about the subheading distribution check and the keyphrase in subheadings check in Yoast SEO:
How to get a green traffic light for your subheading distribution
What do you do if you get an orange or red traffic light in the Yoast SEO plugin for your subheading distribution? First of all, and this is quite obvious, don’t forget to use subheadings. You should try to create a subheading for every separate topic in your text. This could be for every paragraph or a couple discussing the same topic.
We suggest that you include a heading above every long paragraph or group of paragraphs that form a thematic unit. The text following a subheading should be 250-350 words.
An example heading structure
Let’s say that we have a blog post about ballet shoes. We’ve chosen “ballet shoes” as our focus keyword and written an article about why we like ballet shoes. Without headings, there’s a risk that we might end up writing a long, rambling piece that is hard to understand. But if we structure things logically using headings, we make it easier to read and help focus our writing.
Here’s what the structure of that post might look like:
- H1: Ballet shoes are awesome
- H2: Why we think ballet shoes are awesome
- H3: They don’t just come in pink!
- H3: You can use them for more than just dancing
- H3: They might be less expensive than you think
- H2: Where should you buy your ballet shoes?
- H3: The ten best ballet equipment websites
- H3: Our favorite local dancing shops
- H2: Why we think ballet shoes are awesome
See how we’ve created a logical structure, using H2 tags to plan sections and H3 tags to cover specific topics? We’ve done the same thing in the post you’re reading right now!
This is an excellent example of how your headings should be structured in a medium-length article. You should use fewer (or more general, high-level) headings for a shorter article. If you want to go into more detail, nothing stops you from using H4 tags to create even ‘lower-level’ sections.
Adding headings
Knowing how to structure is all well and good, but how do you add headings? The best way to explain this is in two of the most popular CMSs: WordPress and Shopify!
Note: The instructions below will walk you through how to add in-text subheadings. Don’t forget to add a post title at the top of the page, too! In Yoast SEO Premium, you’ll get a reminder to do so if the ‘Title’ field is empty. In addition, if you use Yoast SEO Premium, you get various other AI features, like Yoast AI Optimize, that help you do the hard work.
How to add a heading in WordPress
If you’re using WordPress, there are a couple of ways to do this:
Via the editor
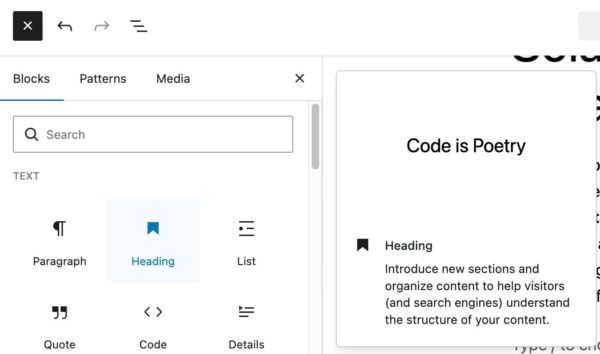
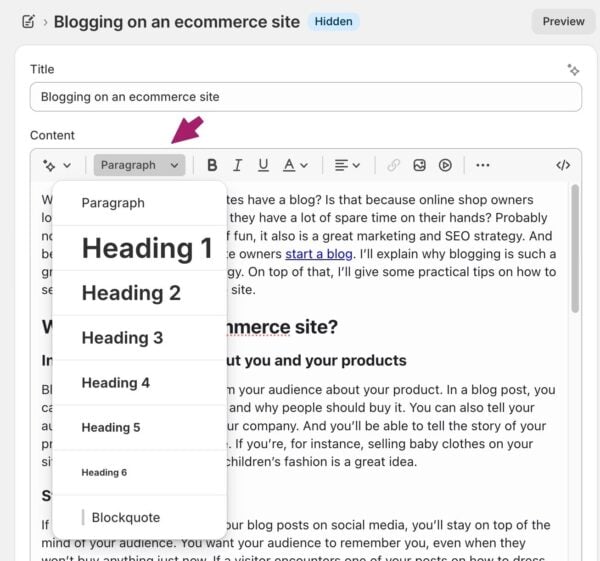
The easiest way to add headings is through the editor. If you use the block editor, click the + button and select ‘Heading’. Then, you can select which heading (H2, H3, etc.) you want to add.
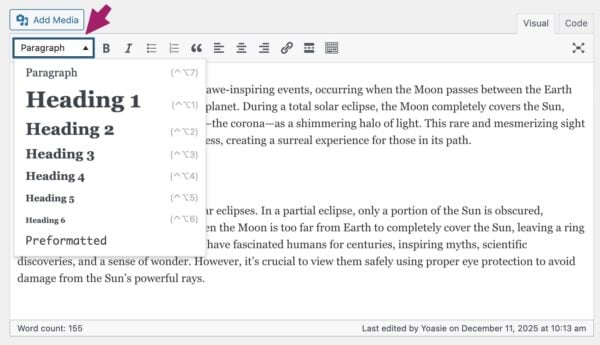
If you’re still using the classic editor in WordPress, it’s easy, too. Ensure you’re on the visual tab of the editor and select ‘Heading 2’ or another heading from the dropdown menu.
Using HTML
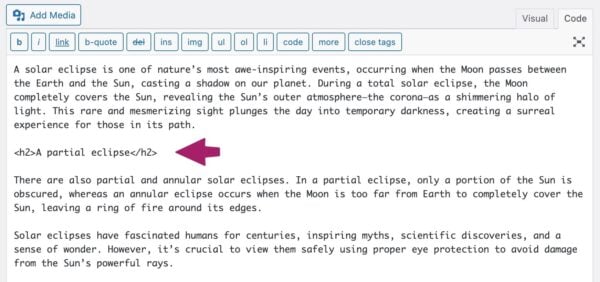
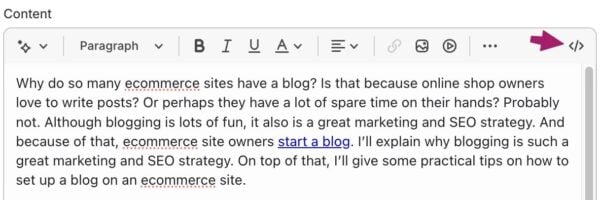
It’s also possible to add headings using HTML. In the classic editor, you will need to make sure you’re on the text tab (or directly in the code) and use heading tags <h1>, <h2>, <h3>, etc., to specify each type of heading. End each heading with a closing tag like </h1>. Like this:
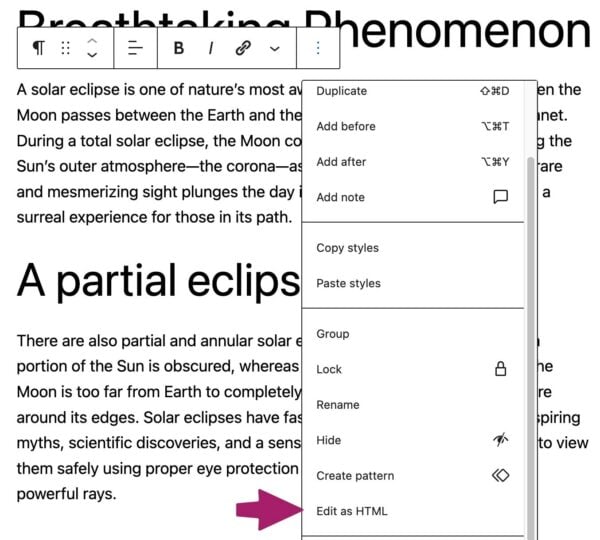
You can switch between the visual editor or edit as HTML in the block editor. Click on the three vertical dots in the block toolbar to do that. Then, select the Edit as HTML option. Like this:
How to add a heading in Shopify
Adding headings in Shopify is similar to that in WordPress’s classic editor. If you’re in the content editor, you can select a piece of text and select the appropriate heading from the dropdown in the formatting menu item:
If you prefer to work in HTML, you can select the code sign in the upper right corner of the editor and create headings in HTML as described in the instructions for WordPress above.
Using your keyphrase in the subheadings
Headings allow you to prominently use your focus keyword (or its synonyms) to clarify what the page is about. By adding your focus keyphrase to your subheadings, you stress its importance. Moreover, if you’re trying to rank for keywords, you must write about them. You’ll probably have difficulty ranking if none of your paragraphs address the main topic.
Still, just like keyphrases, it’s important not to overdo it. Add your keyphrase where it makes sense and leave it out where it doesn’t.
Yoast SEO can help you with the keyphrase in headings assessment
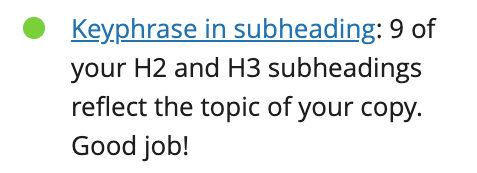
After you insert your keyphrase in Yoast SEO, the keyphrase in subheadings assessment checks whether you’ve used it sufficiently. In Yoast SEO, you’ll get a green traffic light if you use the keywords in 30 to 75% of your subheadings. Please note that we’ll only review your H2 and H3 subheadings. If you have Yoast SEO Premium or if you’re using the Yoast SEO for Shopify app, you can even check your use of synonyms.
How to add your keyphrase in your subheadings
Whether you add your keyphrase to a subheading depends on the paragraph(s) it’s connected to. Every paragraph in your text should tell the reader something about the topic. In addition, your subheadings are nothing more than a very short outline of what you will say in one or more paragraphs. Therefore, adding your keyphrase to one or more subheadings should always be possible. If you’re still struggling to achieve this, ask yourself a couple of questions about the structure of your article.
- Does my text discuss the topic described in the keyphrase? If not, should I pick other keywords?
- Do my current subheadings accurately describe what I discuss below?
- What paragraphs are most closely connected to the topic and the keyphrase?
- What questions do these paragraphs answer concerning the topic and the keyphrase?
Most of the time, you’ll find that answering these questions helps you add the keywords to one or more of your subheadings. If you can’t, you should probably reconsider question number one. If that doesn’t solve your problems, consider educating yourself on copywriting and text structure, to get a clearer view of how a good piece is structured. Your keyphrase should be central to the topic. Therefore, you should be able to add the keywords to several subheadings.
Headings in themes
Most themes will use headings as part of their HTML code, but some don’t follow best practices. Almost all themes will automatically use the name of your article in an H1 tag. This is helpful because you don’t need to repeat the post name inside your content.
Unfortunately, some themes use tags incorrectly, in an illogical order (e.g., an H4, then an H2) or use tags messily in sidebars, headers, and footers. This can cause accessibility problems, as the order of your headings may not make sense. Users, search engines, and assistive technologies typically examine the entire page, not just your content area.
If you have a custom theme, you may be able to resolve this issue by adjusting your HTML code. You may need to contact the developers if you’re using an off-the-shelf theme. Either way, you should verify that your headings are consistent across each template type on your website.
Check your blog’s headings
Using headings well is helpful for your users. It increases the chances of people reading your article, improves accessibility, and might even contribute to SEO. So add them to your copy, but make sure you use them correctly!
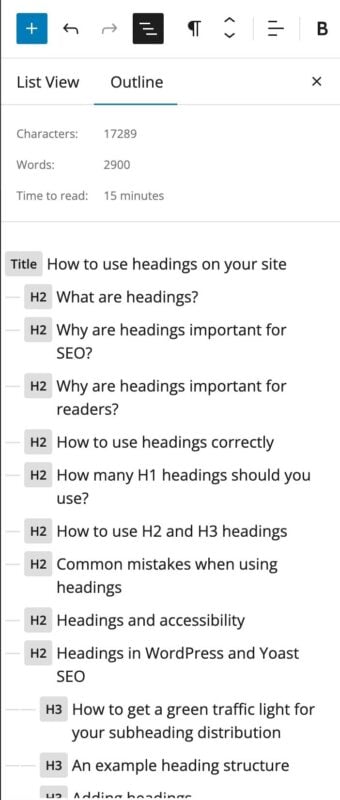
The document overview is a handy button located in the upper left corner of the WordPress block editor’s content editing screen. This shows an outline of the page you’re editing. If you’ve structured your content well, it should look like this!
If you’re using Shopify or the Classic Editor in WordPress, you can test your published article via the W3 Validator.
Final thoughts
Headings are one of the simplest and most powerful tools you have for improving both readability and SEO. They guide your readers through your content and help search engines understand what each part of your page is about.
Use one clear H1 to define your topic. Use H2s to structure your main ideas. Use H3s where they genuinely improve clarity. Write your headings for people first and let optimization support that goal.
Read more: WordPress SEO: the definitive guide to higher rankings for your WordPress site