The redirect manager in Yoast SEO Premium
In this article, we’ll explain the redirect manager in Yoast SEO Premium. You’ll learn where to find the redirect manager in Yoast SEO and how to create redirects with it.
What are redirects?
Whether you’re cleaning up pages on your site or changing your site structure, everybody has to delete posts or pages at some point. Deleting comes with a risk though, because when the old URL gets visitors, they’ll be served a 404 not found error.
In most cases, you want to redirect the old URL to a new one. In other cases you want to tell your visitors content has been deleted or temporarily show another page. This is not only important for visitors, but also for search engines. You have to tell search engine robots that there has been a change in your URLs and that they have to go somewhere else, temporarily or permanently. You can do that with redirects.
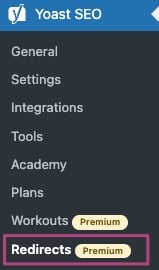
Where to find the redirect manager
If you have Yoast SEO Premium, you have access to the Redirects menu.


Learn more about the other tools and settings Yoast SEO offers in the configuration guide for Yoast SEO.
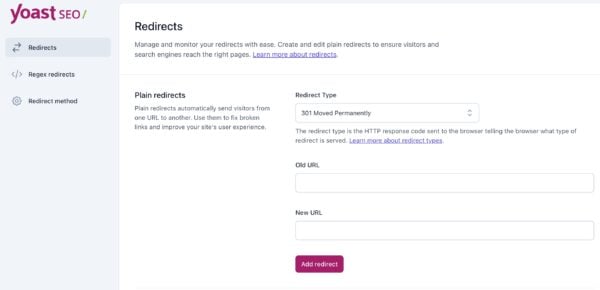
How to create a redirect in Yoast SEO
Follow the step-by-step instructions on how to create redirects in our How to direct a post or page in Yoast SEO Premium article.
Types of redirects
There are many cases in which you might use a redirect. For example, when you delete a page or post, when you transfer your site to a new domain, or when you change your URL structure. Because of this, there are different redirect types you can choose from in Yoast SEO Premium.
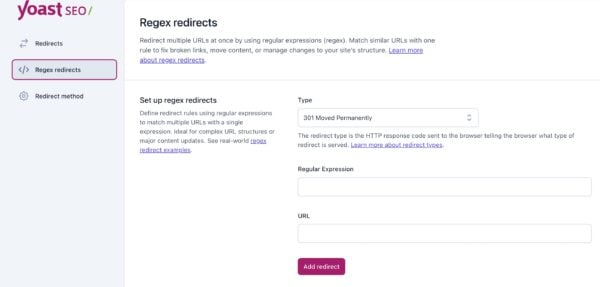
Regex redirects
If you’re an expert SEO and you need to do complex redirections, you may need to use Regex redirects. With normal redirects, you specify a single source URL and a destination URL. With Regex – regular expressions – redirects, you can, for instance, make a single redirect to move entire groups of URLs containing a specific keyphrase to a new location. This could save you a ton of time while working on a massive SEO project. However, you should only use Regex redirects if you know what you’re doing because they can easily break your site.

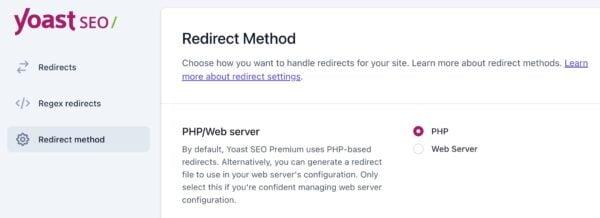
Redirect method
You can choose how you want to handle the redirects on your site.

By default, we enable PHP-based redirects. In this case, WordPress takes care of your redirects. This methods always works, is simple to use, but might be slightly slower. If you’re not familiar with redirecting methods, we always recommend leaving this setting on PHP.
You can also choose the Web Server option. This may be more complicated, depending on how you set up your website. If you run Apache, we can update redirects on the fly in your .htaccess file. This is a faster option because it bypasses WordPress. If you run nginx, we’re unable to do this, so we recommend the PHP method.

