How to use the WordProof integration in Yoast SEO
In cooperation with WordProof, Yoast SEO provides you with an easy-to-use timestamping feature for your privacy policy and terms and conditions pages. WordProof uses the blockchain to timestamp content, which makes it almost impossible to be tampered with. Timestamped content shows the time and date you published the page. By using it, you’ll be able to prove to users and search engines that your content is authentic and trustworthy. It’s also good to note that this means that some parts of your timestamps are irreversible by principle. This will ensure your customers or visitors that you stick to your policies and terms and don’t manipulate them.
In addition, trust is also essential for search engines, as they determine the quality of your site partly based on its trustworthiness. Although this is a relatively new technology, we believe it will become big in SEO. And this integration is your chance to be one of the pioneers who get to use it!
With the WordProof integration in Yoast SEO, you can use ten timestamps per month for free. One timestamp is used every time you update the page. To access more timestamps, you’ll need to buy a WordProof subscription.
Want to know what happens with the data that gets sent to WordProof? You can read more about that in their terms and conditions and privacy policy.
How to timestamp your content with WordProof in Yoast SEO
Timestamping your content is easy with the WordProof integration in Yoast SEO. Follow the steps below to learn how it works.
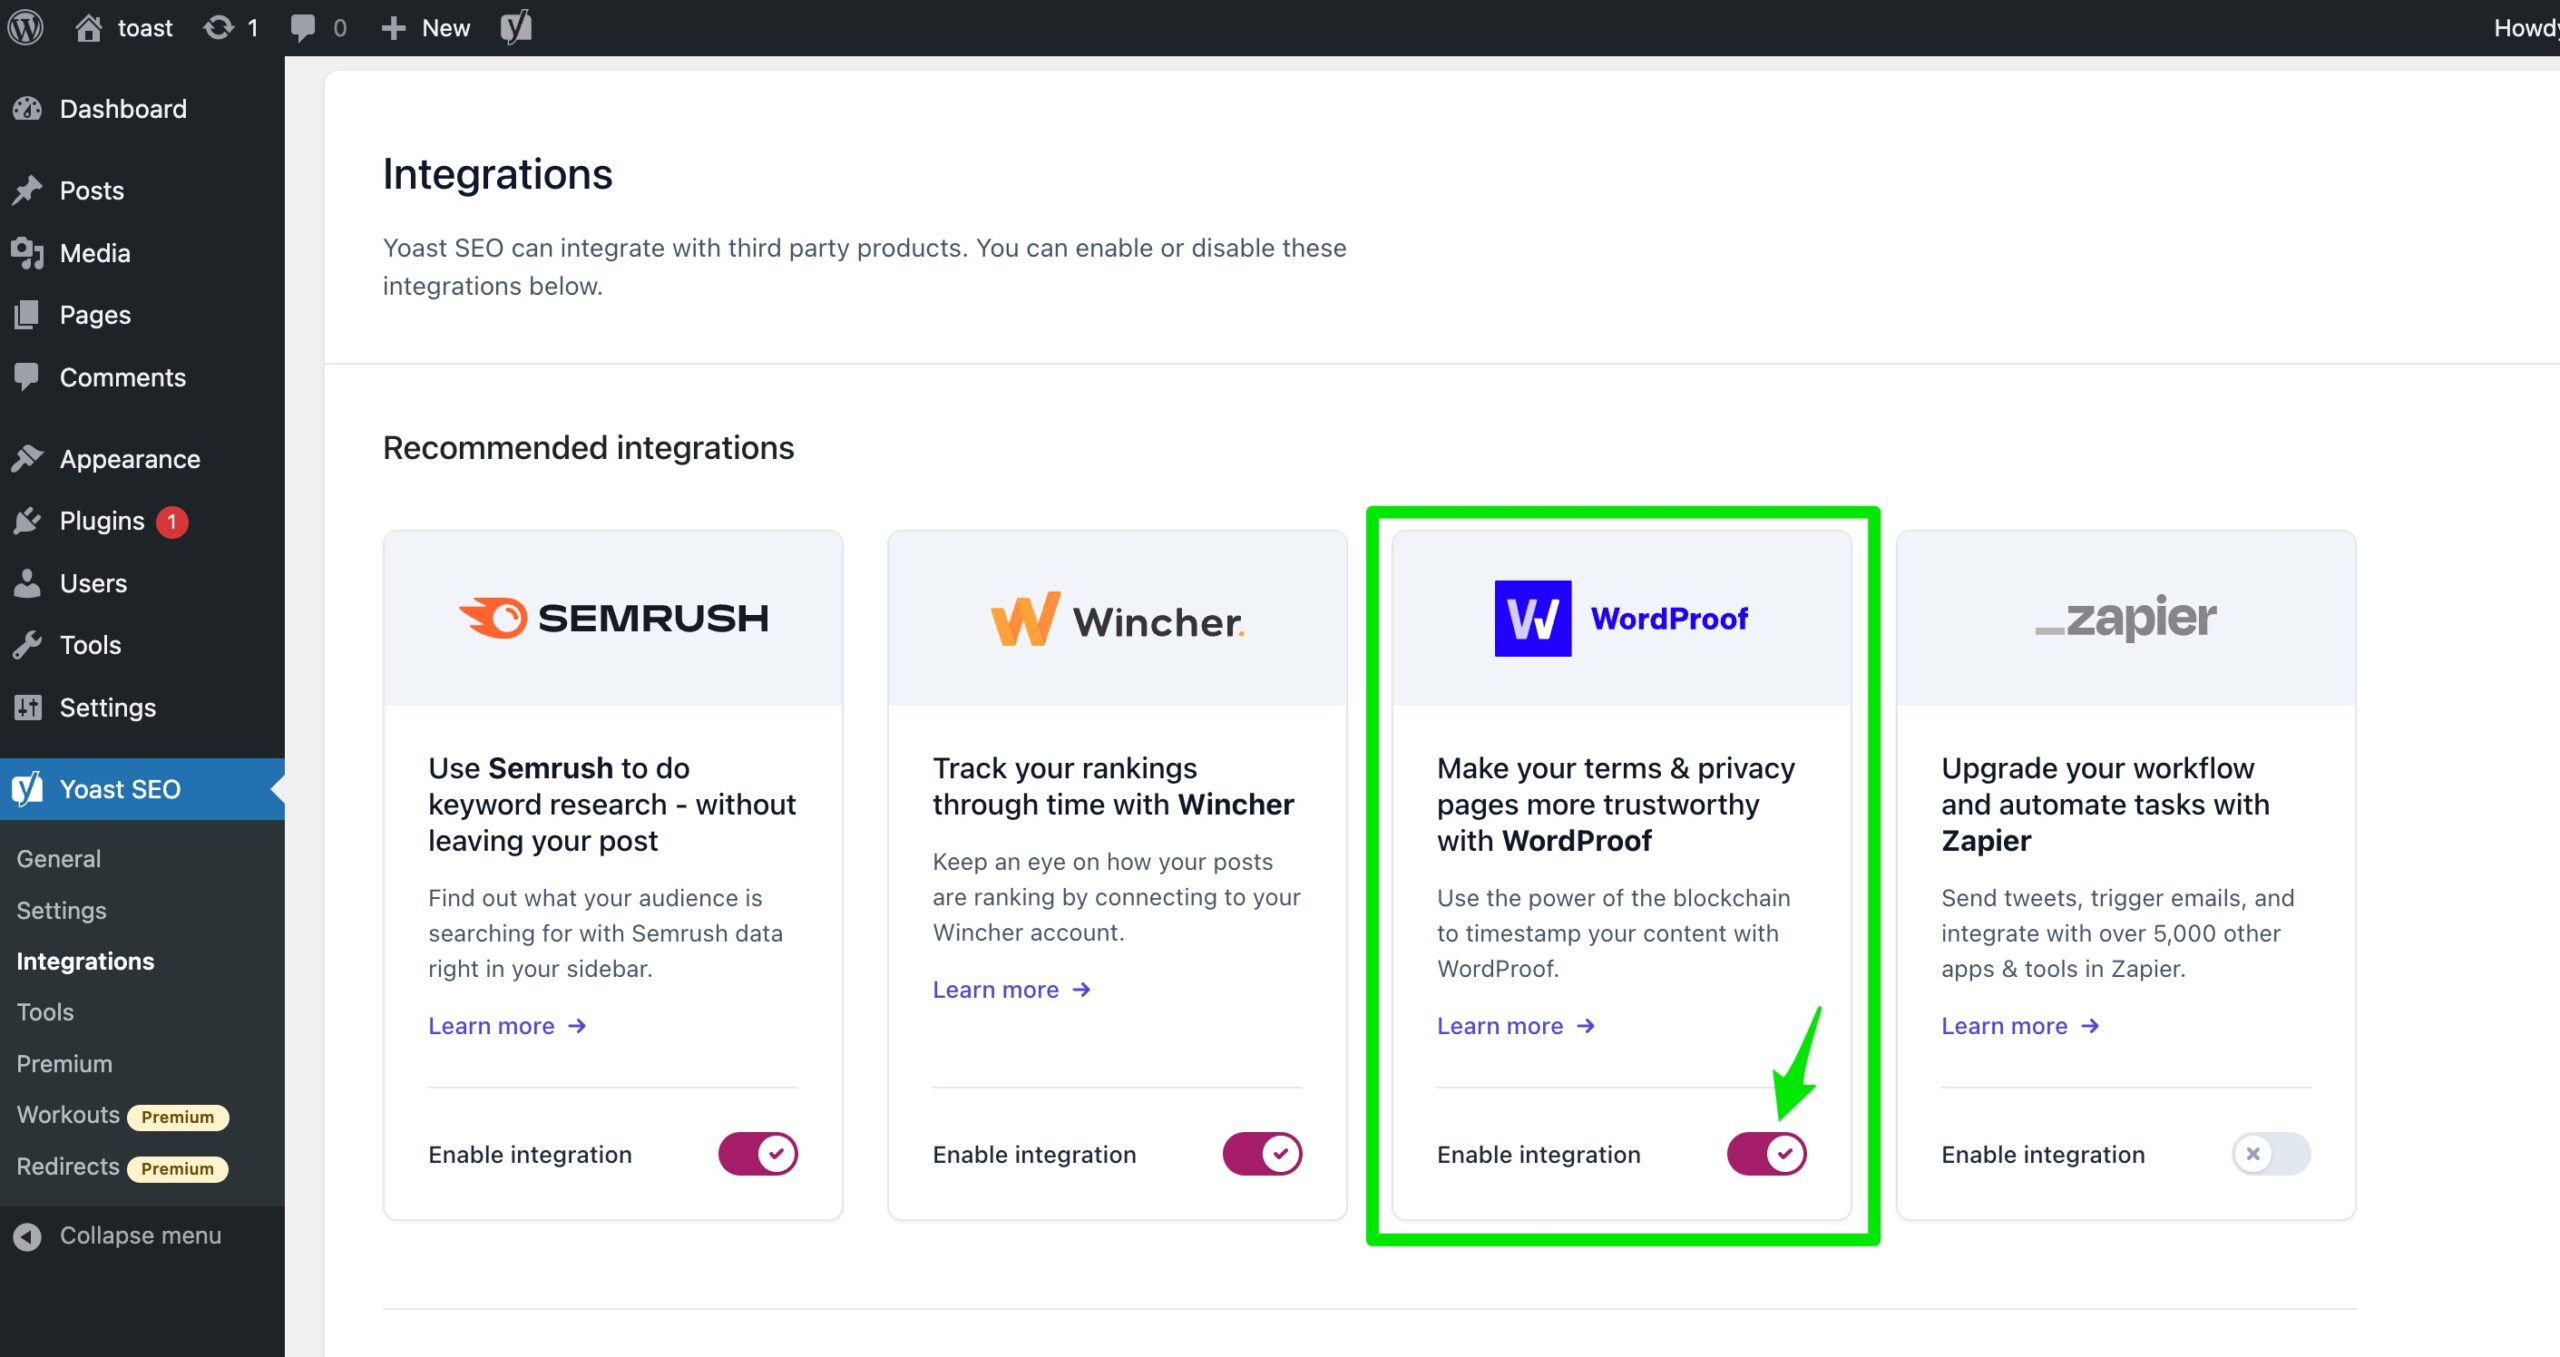
- Make sure the WordProof integration is enabled in Yoast SEO.
To do that, go to Yoast SEO > Integrations and make sure the WordProof integration toggle is switched on.
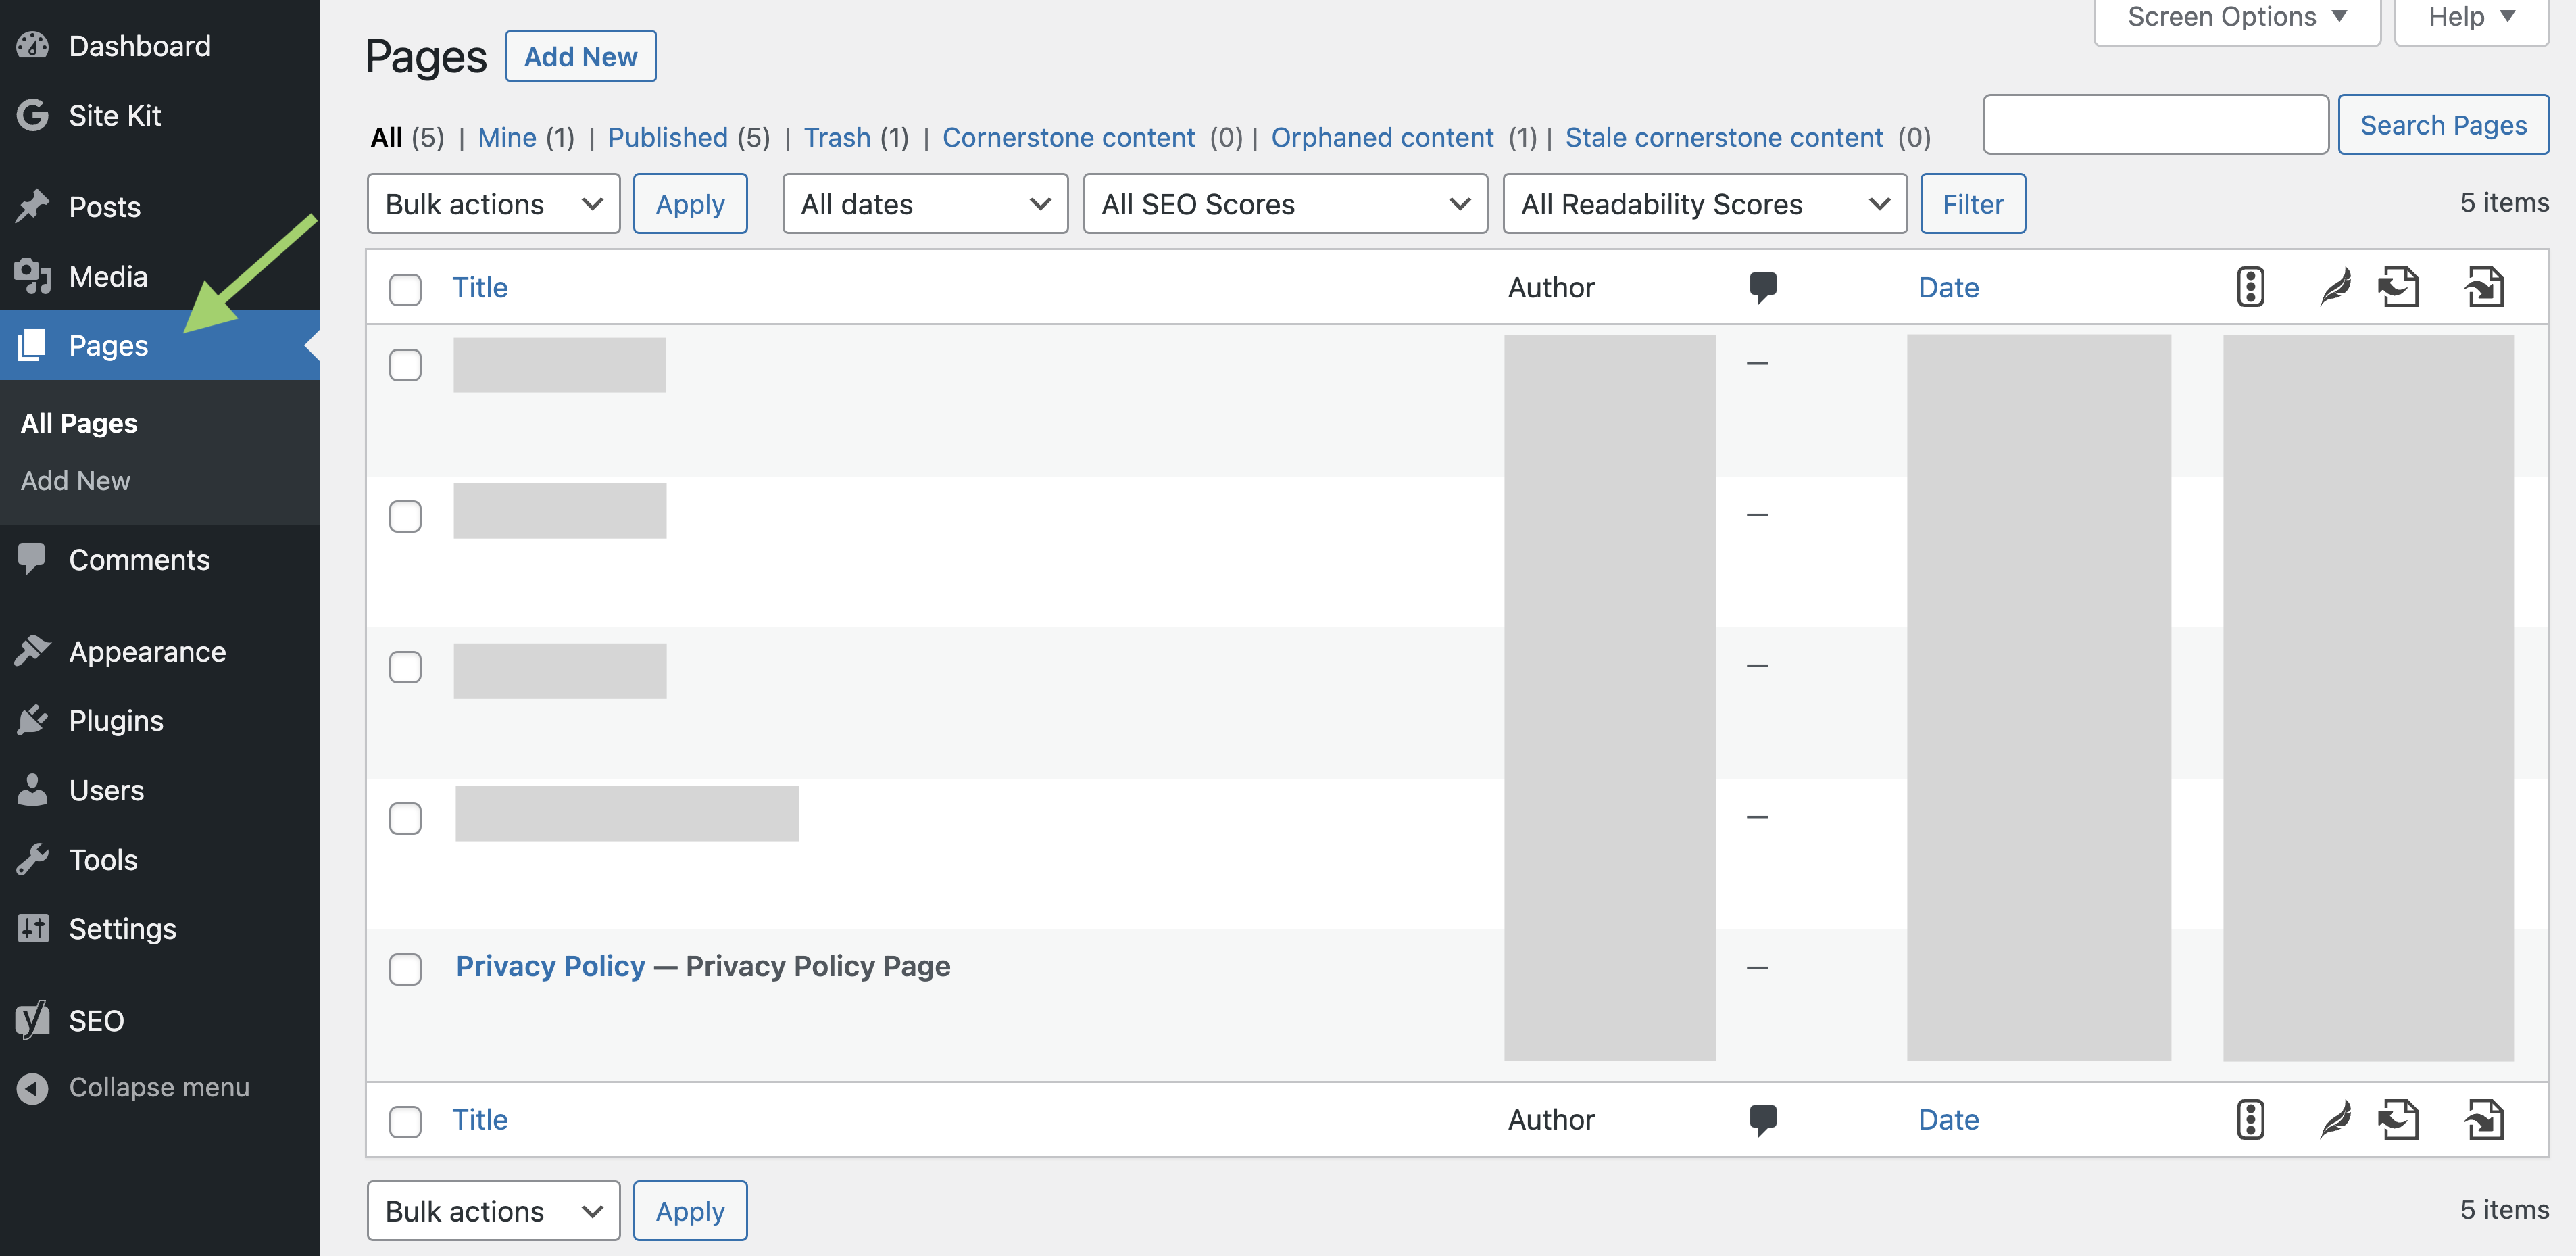
- Open your Privacy Policy page (or Terms and Conditions in WooCommerce).
You can find these pages by clicking the Pages menu item, which will open the Pages overview screen (shown below).
- Go to the Yoast SEO sidebar and expand the Advanced tab.
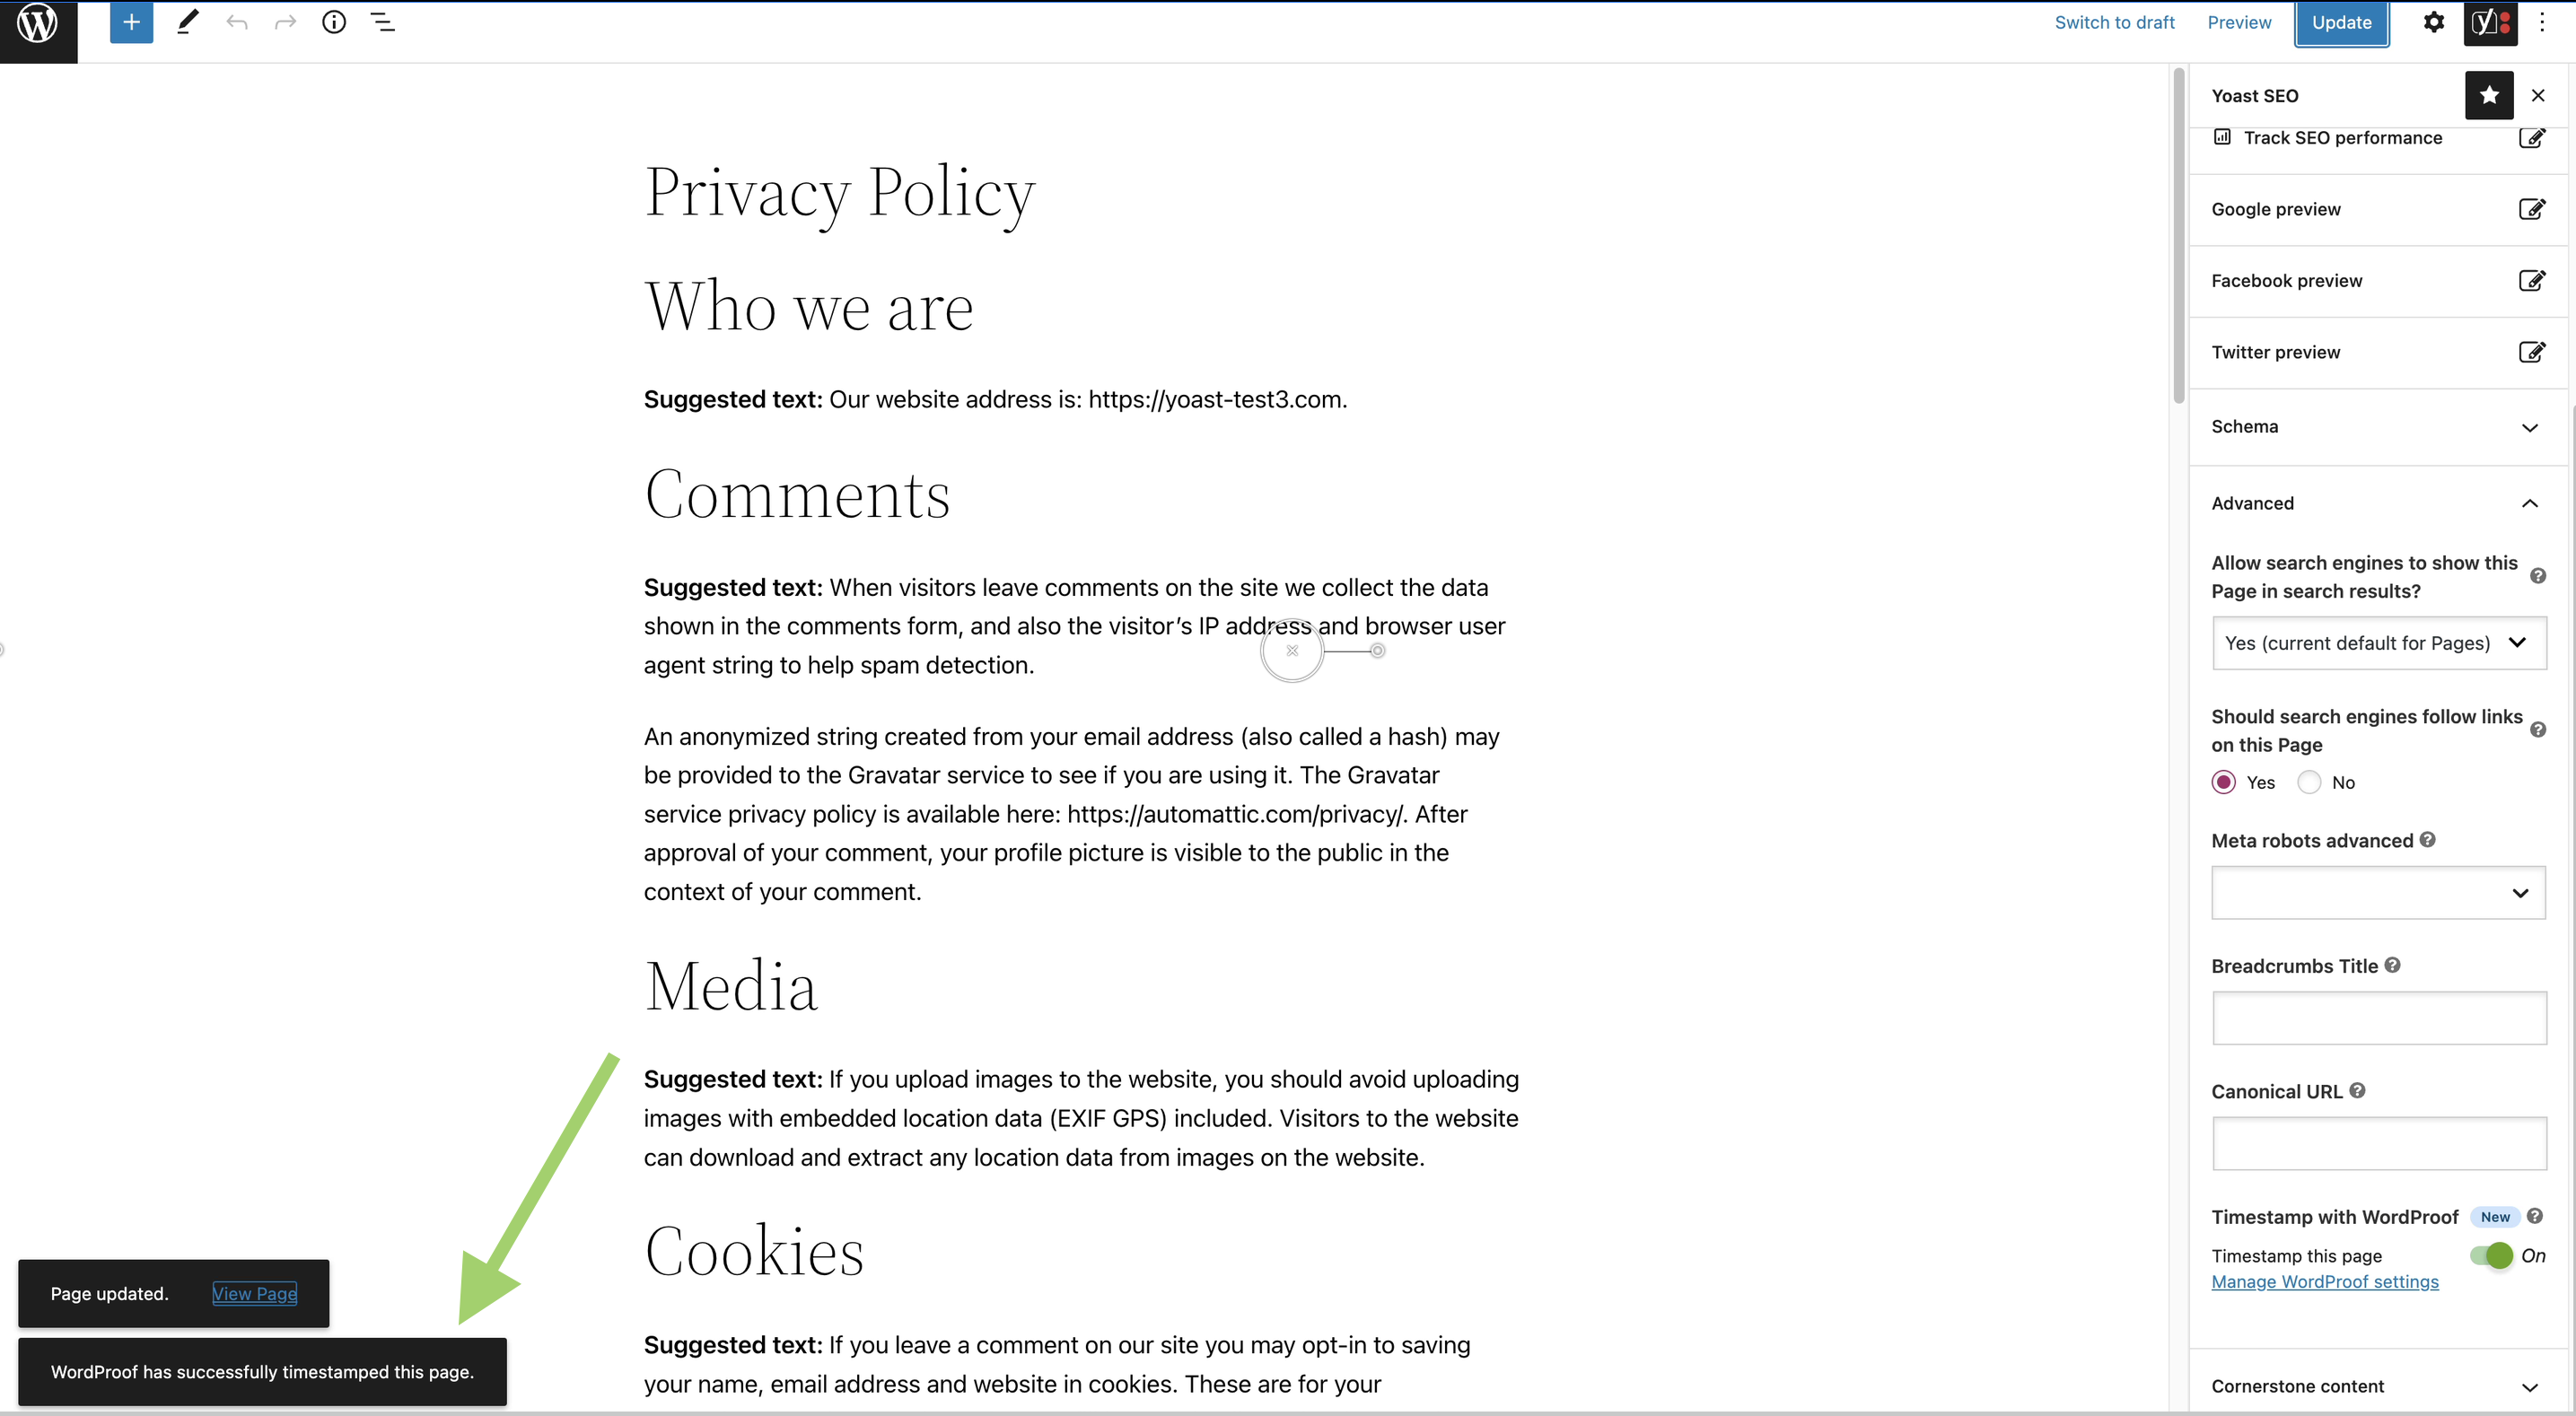
The WordProof toggle is at the bottom of the Advanced settings (shown in the screenshot below).
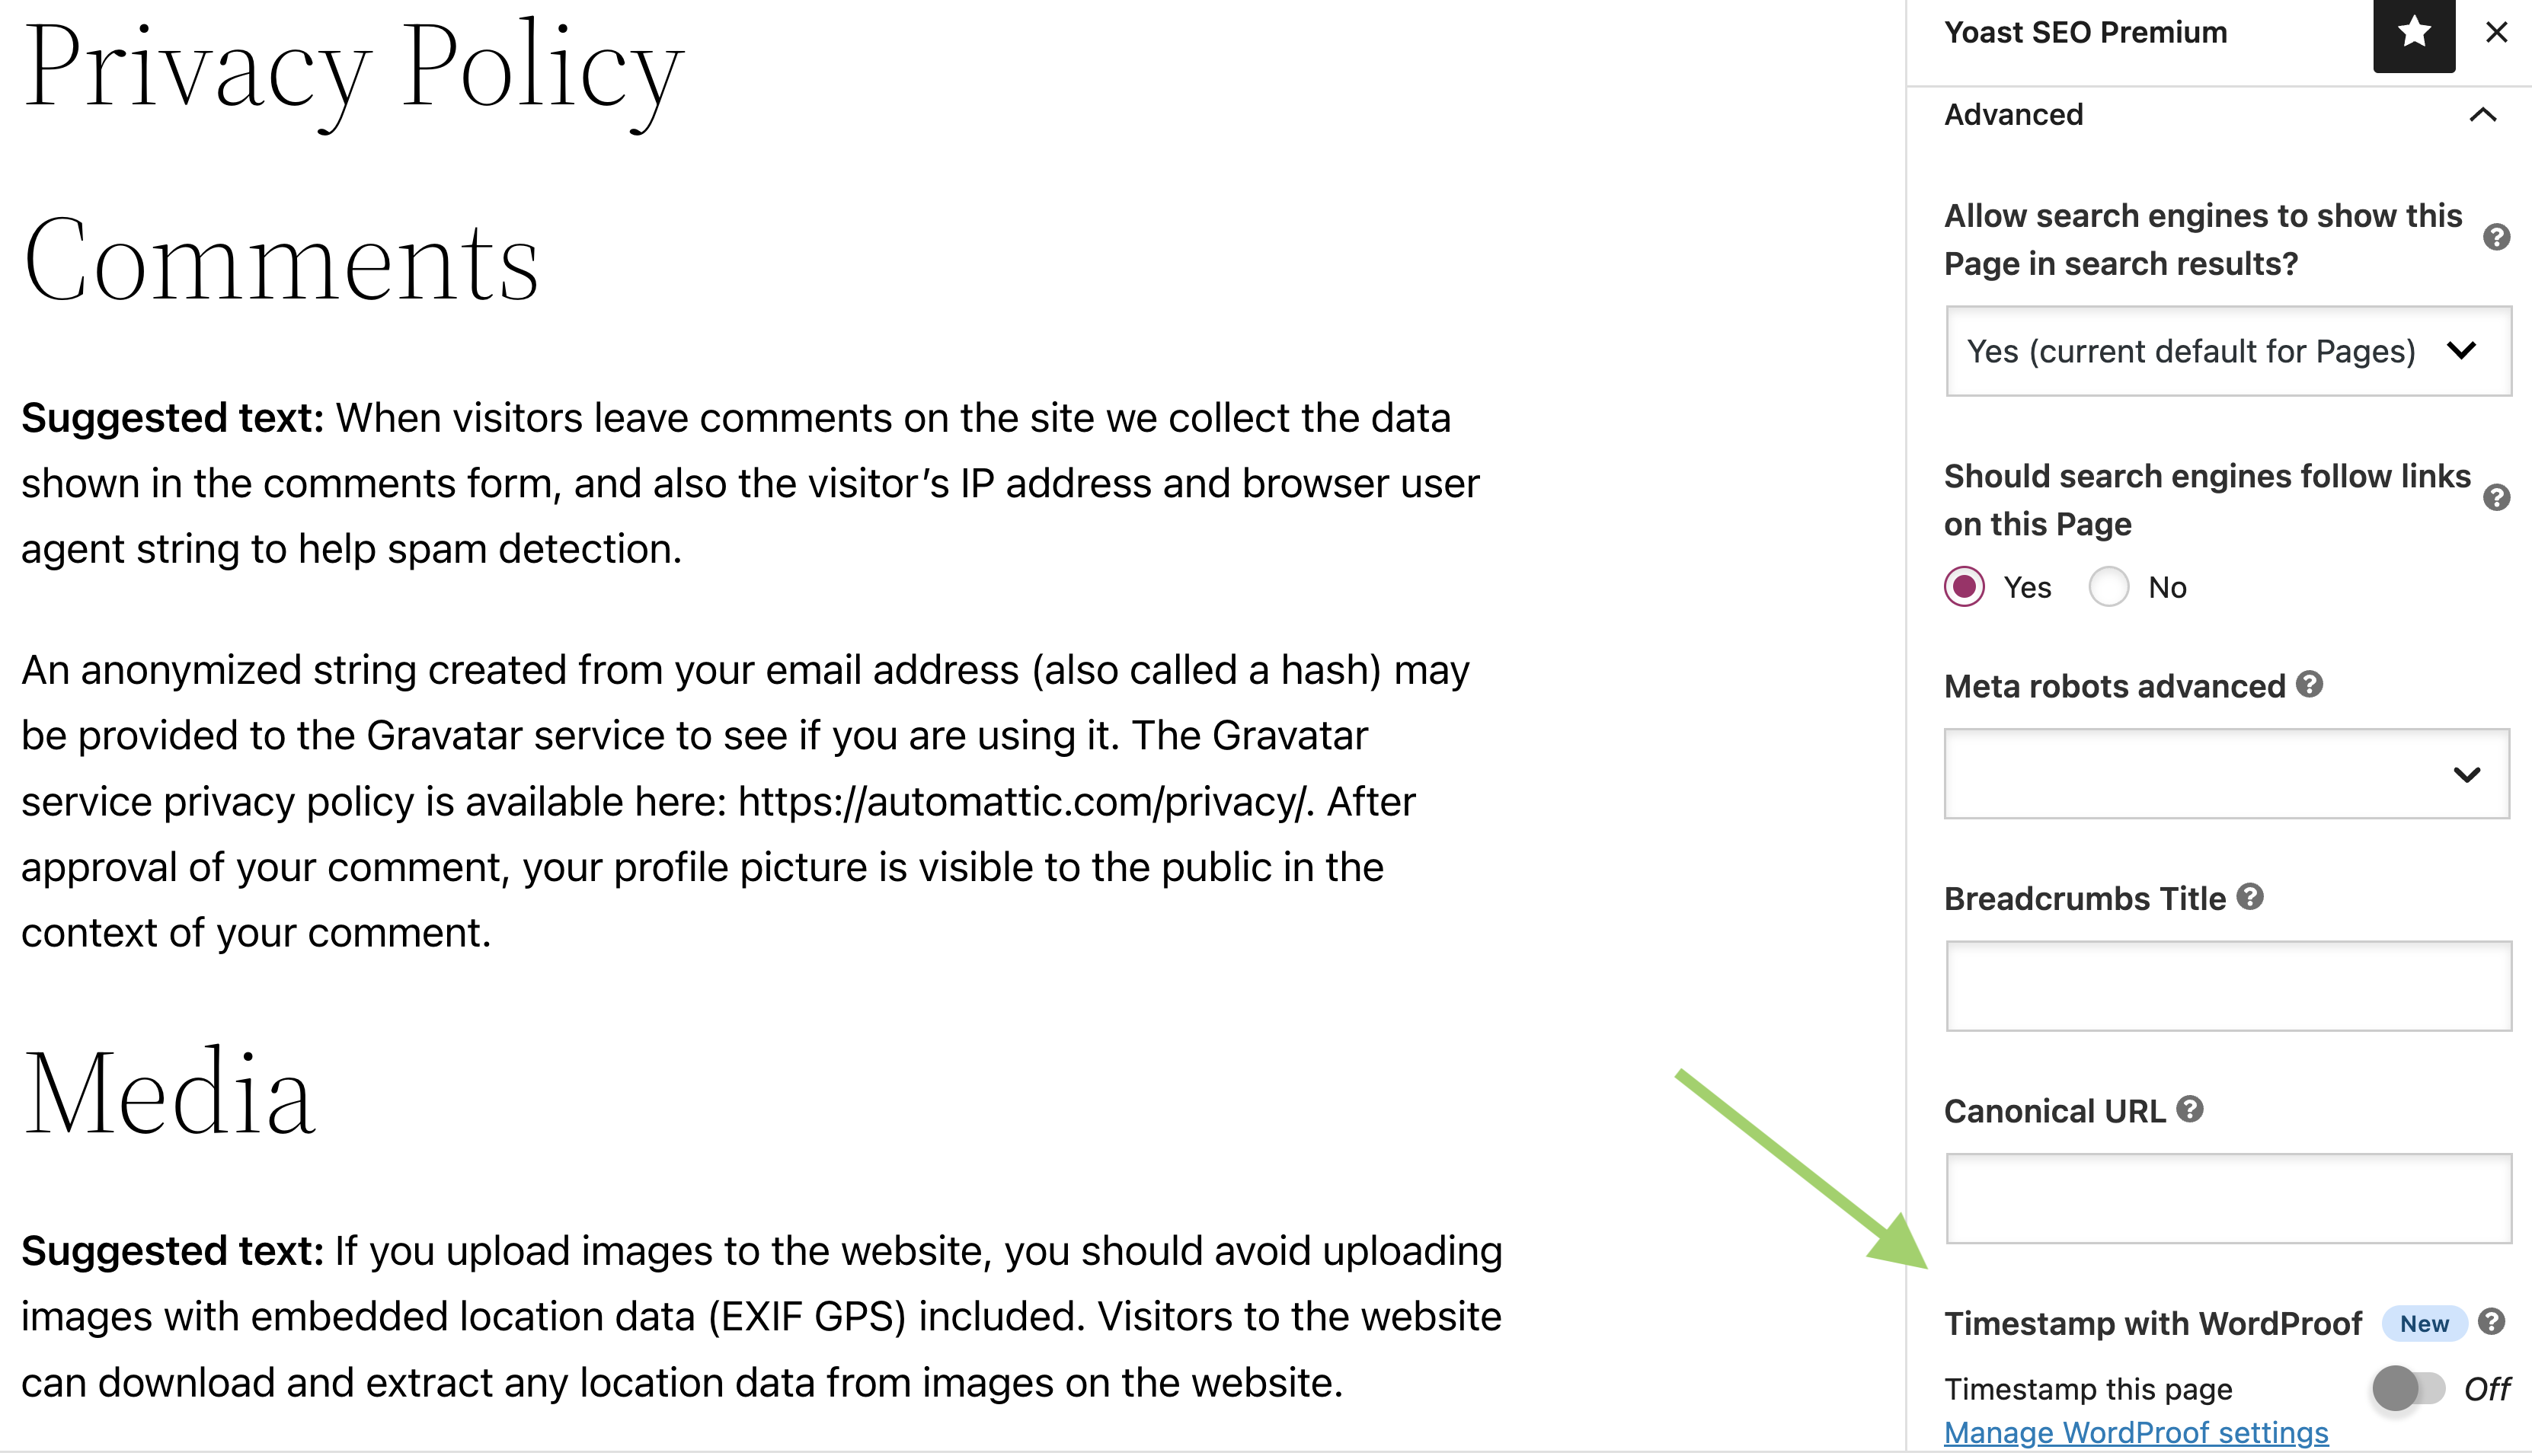
- Enable time stamping for this page by switching the ‘Timestamp this page’ toggle on.
When you switch the toggle on for the first time, you’ll get a popup window requesting you to log in or register in WordProof. Follow the steps in the popup window to complete your login or registration. When you are done, the screen informs you that the connection to WordProof is complete.
Note: The WordProof settings are saved per site and not per account. So, if you log in with different accounts, your settings (and used timestamps) will not change.
- Click the Update button at the top of the page.
You will receive a notification at the bottom of the editing screen informing you that WordProof has successfully timestamped the page.
- Preview the WordProof certificate on the page.
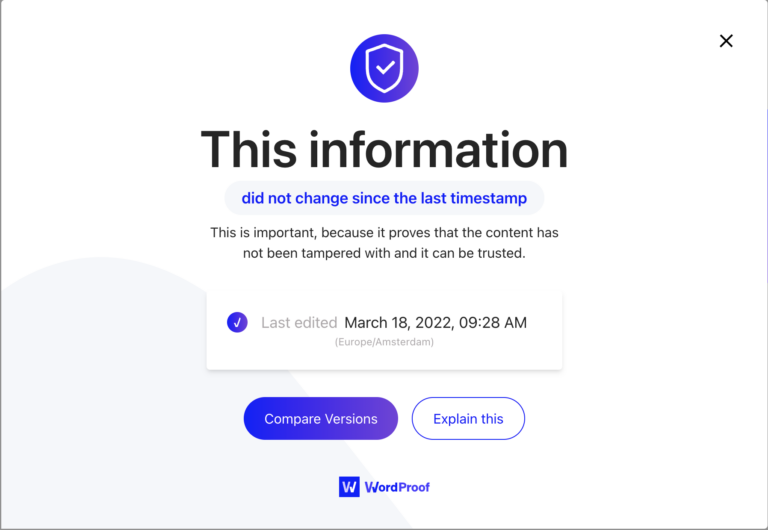
Open the Privacy Policy page and scroll to the bottom of it. You will see the WordProof stamp there. Click on it to view the certificate (shown in the screenshot below).
- Optional: Manage the WordProof settings.
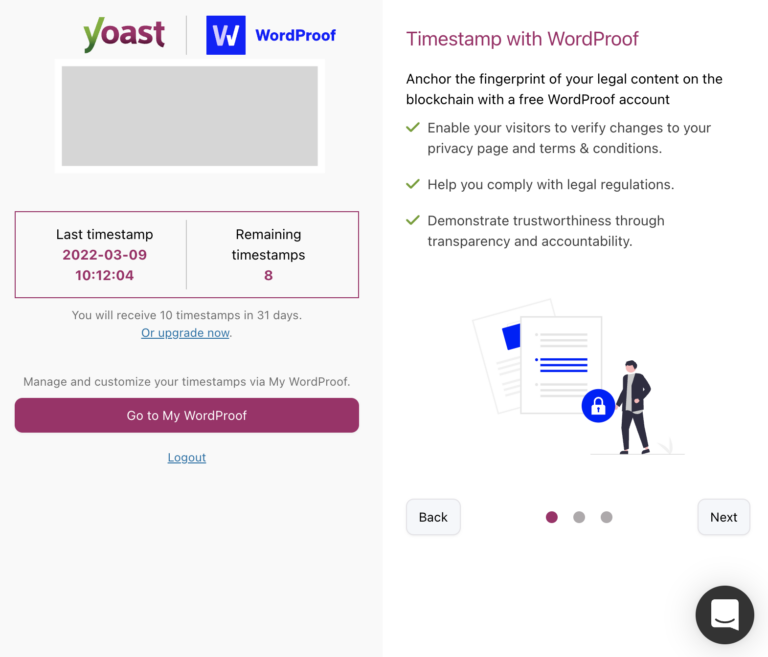
Click the ‘Manage WordProof settings’ link below the WordProof toggle in the Advanced settings of the Yoast SEO sidebar. That will open a popup window with information about the timestamp (see screenshot below). Click Go to my WordProof to open the settings. There, you can add some text to the WordProof stamp and decide how the content of the certificate is shown.
- Preview the changes you made.
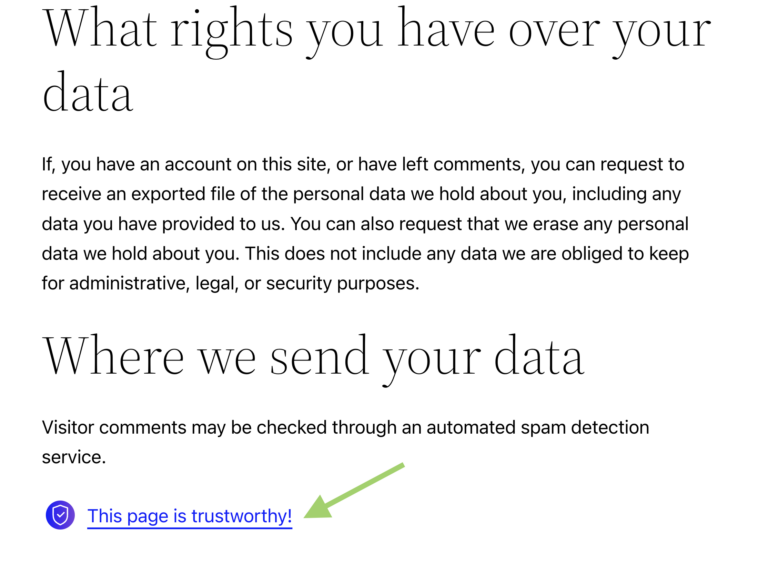
Go to the page, and scroll to the bottom of it to check how the stamp is shown.
Making sure Yoast SEO and WordProof can recognize your pages
Creating or changing a privacy policy page
To be able to use the feature, you will need to create a Privacy Policy page with the WordPress settings. To do that, follow these steps (the steps are also shown in the screenshot below).
- Go to the Settings menu item in the admin menu.
- Select the Privacy Menu item.
- Click the Create button to create a new page.
You will be taken to the page editor, and you will see a pre-filled template for a privacy page that you can adjust to your needs.
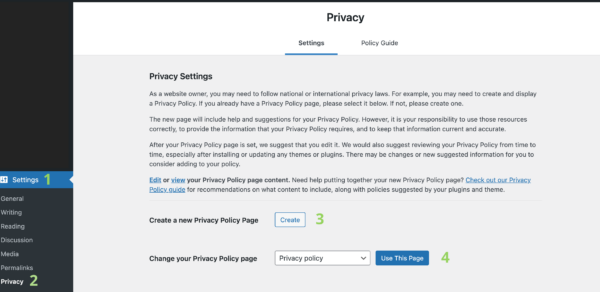
If you’ve already created a Privacy policy page in the Page editor instead of with the Privacy settings, you can set it as the official policy page here.
- Click the drop-down menu next to Change your privacy policy page and select the page (number 4 in the image above).
- Click the Use This Page button.
Your page will be set as the official Privacy Policy page.
Setting a Terms and Conditions page in WooCommerce
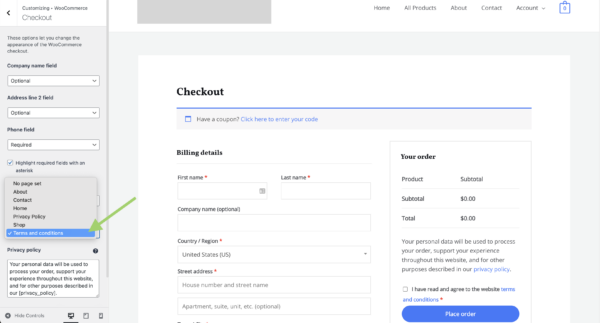
Unlike the Privacy Policy page, which you can either create or set with the Privacy settings, you can only set the Terms and Conditions page with the Customizer settings in WooCommerce. So, you’ll already need to have created a Terms and Conditions page. Then, you can set it by following these steps:
- Go to the Appearance menu item in the admin menu.
- Click Customize.
The Customizer screen will open. - Select WooCommerce in the Customizer menu.
- Click Checkout.
At the bottom of the settings, you will see the Terms and Conditions page option. - Click the drop-down menu to find and select the page you want to set.
- Click Publish to save the changes.
You’ll see a Terms and Conditions label on the Page overview screen next to the page you’ve set.
