Website maintenance: Check and fix 404 error pages

If your website is important to your business, it’s essential to schedule time to keep it running smoothly. Therefore, we regularly write about the things you should do to keep your site in shape. In this post, we’ll write about the most basic of all: checking for 404 errors.
Note: This post does not cover the required elements of a good 404 page. We do have a post on that, though: Thoughts on 404 error pages.
404 errors and broken links
One of the most annoying things that can happen to a visitor is to hit a 404 “page not found” error on your website. Search engine spiders tend not to like such errors much either. Annoyingly, search engines often encounter other types of 404s than your visitors, which is why the first section of this post is split into two:
1. Measuring visitor 404 error pages
If you use the MonsterInsights Analytics plugin, it’ll automatically tag your 404 pages for you. So then, if you go into your Google Analytics account and go to Behavior → Site Content → Content Drilldown and search for 404.html, you’ll find a ton of info about your 404s (click for larger version):
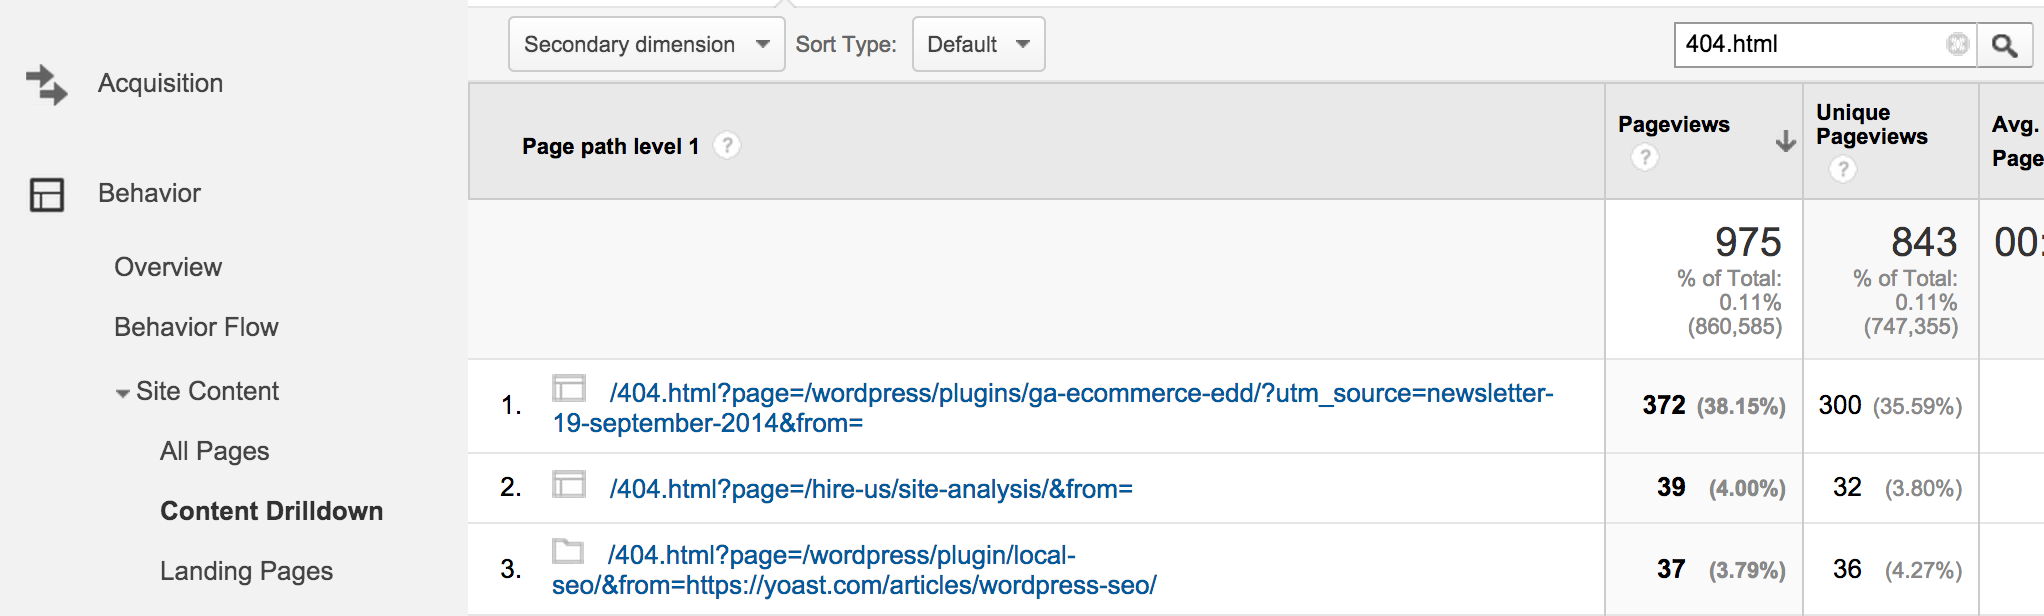
You’ll see URLs like this:
/404.html?page=/wordpress/plugin/local-seo/&from=https://yoast.com/articles/wordpress-seo/
This tells you two things:
- The 404 URL was
/wordpress/plugin/local-seo/(it lacks ansafter plugin) - It was linked to from our WordPress SEO article.
Using this info, you can fix the 404 and go into the article and fix the link.
As you can see from the above screenshot, we also get 404s. We break things all the time because our website is a constant work in progress! Making sure that you notice when you’re breaking things is a good way of not looking stupid for too long, though.
2. Measuring bot 404 error pages
Next to 404s for visitors, search engines will also encounter 404s on your site that can be quite different. You can find the 404s that search engine spiders encounter by logging into their respective Webmaster Tools programs. There are three webmaster tools programs that can give you indexing reports, in which they tell you which 404s they encountered:
- Bing Webmaster Tools under Reports & Data → Crawl Information
- Google Search Console under Coverage → Errors
- Yandex Webmaster under Indexing → Excluded Pages → HTTP Status: Not Found (404)
One of the weird things you’ll find if you’re looking into those Webmaster Tools programs is that search engine spiders can encounter 404s that normal users would never get to. This is because a search spider will crawl just about anything on most sites, so even links that are hidden will be followed.
If you’re serious about website maintenance, you might want to find these 404s before search engines encounter them. In that case, spidering your site with a tool like Screaming Frog will give you a lot of insight. These tools are built specifically to behave just like search engine spiders and will, therefore, help you find a lot of issues.
Fixing 404 errors
Now that we’ve found all these 404 errors, it’s time to fix them. If you know what caused the 404 and you can fix the link that caused it, it’s best to do that. This will be the best indication of the quality of your site for both users and search engines.
As search engines will continue to hit those URLs for quite a while, it actually makes sense to still redirect those faulty URLs to the right pages as well. To create those redirects, there are several things you can do:
- Create them manually in your .htaccess or your NGINX server config
While this is not for the faint of heart, it’s often one of the fastest methods available if you have the know-how and the access to do it. - Create them with a redirect plugin
There are several redirect plugins on the market, the most well-known one being Redirection. This is much easier but has the disadvantage of being much slower. To do the redirect, the entire WordPress install has to load first. This usually adds half a second to a second to the load time for that particular redirect. - Create them with our Yoast SEO Premium plugin
Our Yoast SEO Premium plugin has a redirect module that allows you to make redirects with the ease of the WordPress interface but also saves them to your .htaccess file or an NGINX include file, so they get executed with the speed of the first option above.
Check for image/embed errors
If you’d look at your server logs, you’d get 404 errors of a different type too: 404s for broken images or broken video embeds. You might also have errors that don’t show up in your logs, like broken YouTube video embeds. They don’t cause the entire page not to work, but they do look sloppy. These types of errors are harder to find because webmaster tools programs don’t report them as reliably and you can’t track them with something like Google Analytics either.
The easiest method to find these broken images and embeds is to use one of the aforementioned spiders. Screaming Frog, in particular, is very good at finding broken images. Another method is to check your server logs and go through them, searching for a combination of 404 and “.jpg” and “.png.”
How often should you check for 404 errors?
You should be checking your 404s at least once every month and on a bigger site, every week. It doesn’t really depend on how many visitors you have, but much more on how much content you have and create, and how much can go wrong because of that. The first time you start looking into and trying to fix your 404 error pages, you might find out that there are a lot of them and it can take quite a bit of time… Try to make it a habit so you’ll at least find the important ones quickly.
Assess your technical SEO fitness
Checking for 404 errors is an essential part of technical SEO. Are you curious about how fit your site’s overall technical SEO is? We’ve created a technical SEO fitness quiz that helps you figure out what you need to work on!
Read more: Content maintenance for SEO: research, merge and redirect »
