How to switch to Yoast SEO for Shopify
Yoast SEO is trusted by over 13 million users and it is available for Shopify! You may have heard all the buzz around it and you want to start using it to get the best SEO for your online shop! However, if you are using another SEO app, you are probably wondering if it’s a hassle to switch. Well, we have a feature in Yoast SEO that can help you with that!
The SEO migration tool in Yoast SEO lets you import crucial SEO data, such as SEO titles, and meta descriptions. In this article, we explain how you can do that.
How to import data from other apps
To import your data from another SEO app, you’ll need to export your data with a third-party app, transfer it to a Yoast SEO template and import it back into Yoast SEO. For a detailed explanation of this process, follow the steps below.
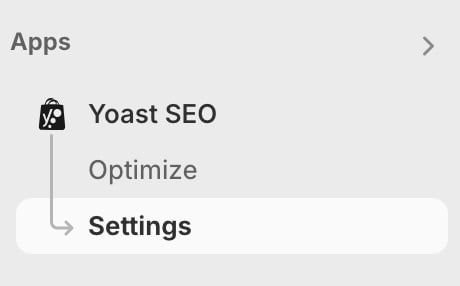
- In Shopify, go to the Yoast SEO Settings
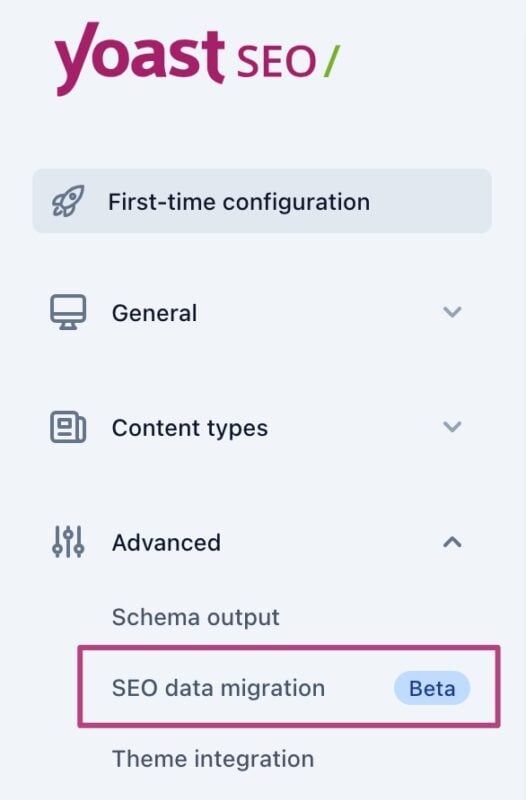
- Go to SEO data migration
- Use a third-party app to export the data
We recommend using Metafields Guru, which we have tested and works. Please note that you’ll need to make a separate export for each content type.
- Export the metadata in a CSV format with Metafields Guru or the app of your choice.
If you are using Metafields Guru, you can use this guide to go through the export steps.
- Open the exported CSV file
- Download the Yoast SEO template
- Copy the content of the exported CSV into the Yoast SEO template
Do not edit the order or the names of the columns! Otherwise, when you import the file back to Shopify, Yoast SEO won’t be able to recognize the values. You can use this list to see how to insert the values properly.
- Save the file as a CSV file
- Return to the Shopify app
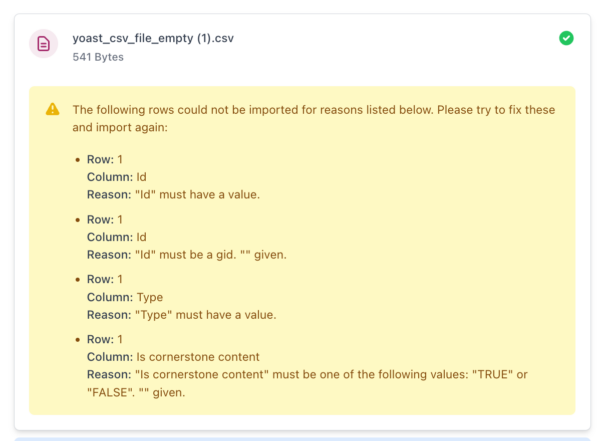
- Import the file to Yoast SEO
If errors happen, Yoast provides feedback so you can fix the file.
- Go to Optimize
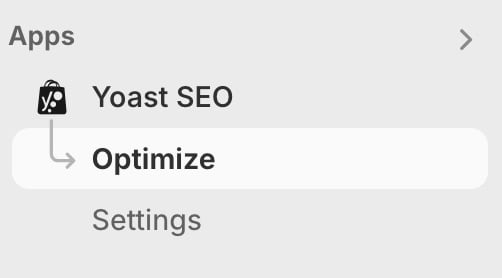
- Check that your data was imported correctly
When you import your data, you’ll see grey assessments. Visiting a product and returning to the overview reveals the correct assessment colors.
I have a problem with importing data
Contact our support at support@yoast.com or reach out to live chat in the Yoast SEO for Shopify app. They’ll be happy to help!
Get more traffic to your Shopify store
Did this article answer your question?
Still having issues?
Try searching for your issue below