How to push updates from a staging site to a live site
If you want to make big changes on your site, you should test these first using a staging environment. This is a copy of your site on your server that allows you to test the changes without affecting your live site. In this article, we’ll explain how to push updates from your staging environment to a live site.
In this article, we’ll use the WP Staging PRO plugin. However, there are many hosting and plugin solutions available, so the interface may look different.
- Back up your staging and live site
Make sure you don’t lose any data.
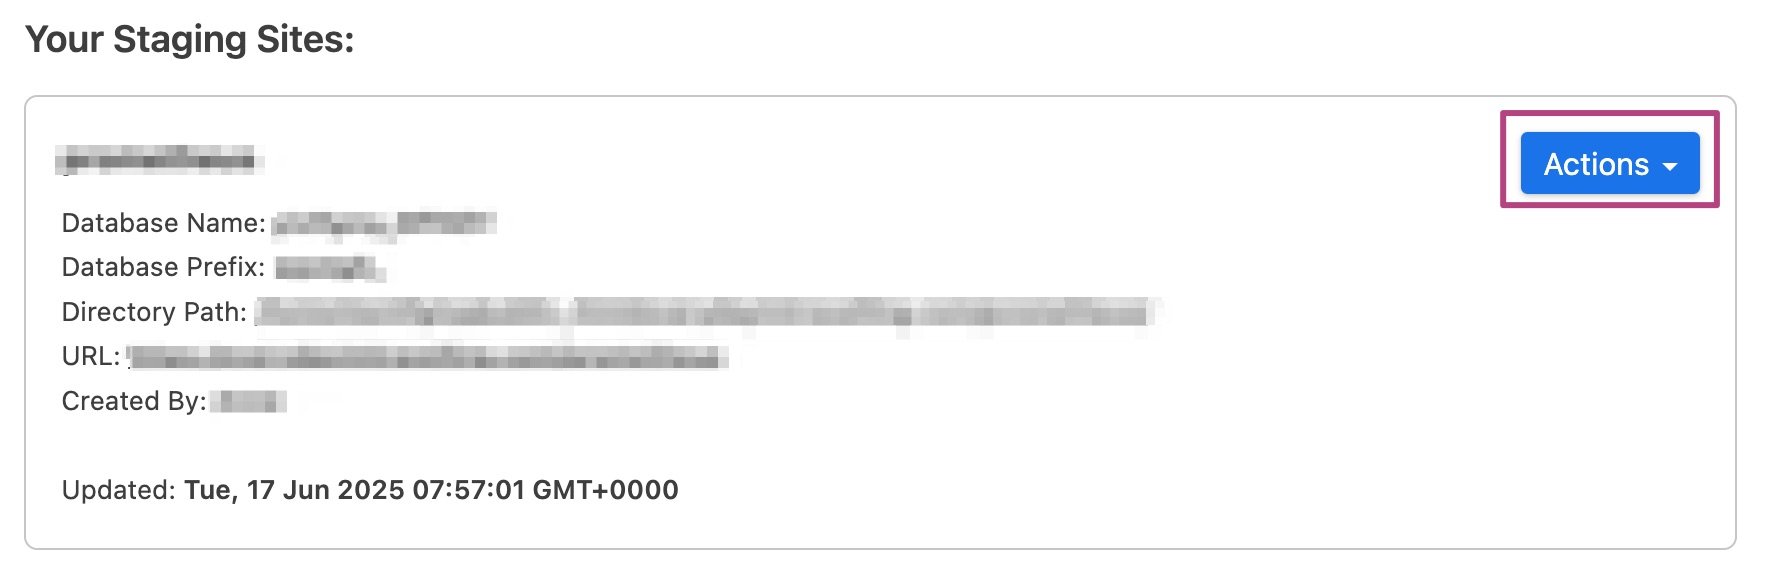
- In your WordPress Dashboard, go to WP Staging
- Under Your Staging Sites, click Actions
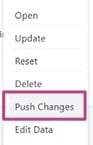
- Click Push Changes
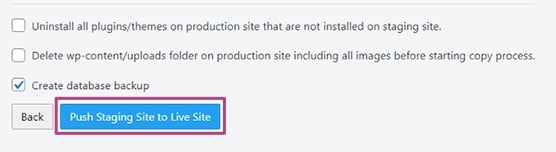
- Select the data you want to push to your live site

- Click Push Staging Site to Live Site
- Reload your website
Reload your website to see the changes you made on your live site.
Get Yoast SEO Premium
$118.80 / year (ex. VAT)
Did this article answer your question?
Thanks for your feedback!
Still having issues?
Try searching for your issue below