The Clicky for WordPress plugin makes it easy for you to add your Clicky analytics tracking code to your WordPress install, while also giving you some advanced tracking options.
Installation of the Clicky WordPress plugin
- Search for
clickyin the plugin install screen under Plugins -> Add New - Install & activate Clicky for WordPress
- Click the link that appears or go to Settings -> Clicky and enter your Site ID, Site Key and Site Admin Key, you can find those on your Clicky homepage.
- Save settings: you’re done.
Clicky Analytics dashboard
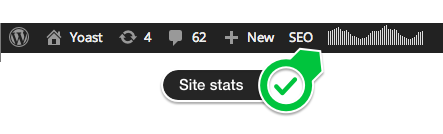
The plugin adds a page under the Dashboard, called Clicky stats, that gives you a quick overview of the stats for your site. It also adds a small image to your WordPress toolbar showing you the visits to your site in the last 48 hours:
Advanced settings for the Clicky WordPress plugin
The Clicky plugin has a couple of advanced settings. They mostly speak for themselves; but let’s go over them:
- Ignore admin users makes Clicky ignore the admin user when they’re logged in.
- Disable cookies makes Clicky track without using any cookies. It still tracks personal data, but it doesn’t use cookies anymore.
- Track names of commenters allows you to see the names of people who commented on your site in your Clicky Analytics.
- The outbound link pattern option allows you to track certain kinds of links as outbound links, when they’re actually internal. This is useful when you redirect, for instance, your affiliate links through a /out/ or /go/ redirect script or plugin locally.
Download
Download the plugin on WordPress.org:
GitHub
Want to follow development, submit an issue or a patch? Come to the Clicky GitHub repo.
Security issues
Please report security issues through our Patchstack VDP.